Photographs by Tessa Neustadt Courtesy Homepolish, With Additional Photography by Zeke Ruelas and Orlando Soria
Dear Readers,
Do you remember that one time I used the above lighting fixture at on my Beach House project?
Also remember that one time I used a similar one in my dining room?
And remember when my dining room looked like that?
… ME NEITHER! But I have had a thing for these modern, industrial fixtures for a while now. But they can be hard to find, especially at a non-crazy price. But that’s where these adorable human beings come in:
This is Jolene and Ben Kraus. This wife-and-husband run Park Studio, which manufactures a bunch of my favorite types of lighting. Here are a few of my favorite pieces from them:

Novato, $150 (this one is going in the entry of Orcondo)


Berkeley, $430 (currently in my dining room, going in the guest room at Orcondo)


I stopped by their studio a few weeks ago because I’m nosy and was curious what type of space all these gorgeous fixtures were created in. Also, I wanted to chat with them about the pieces they’re making for Orcondo. 
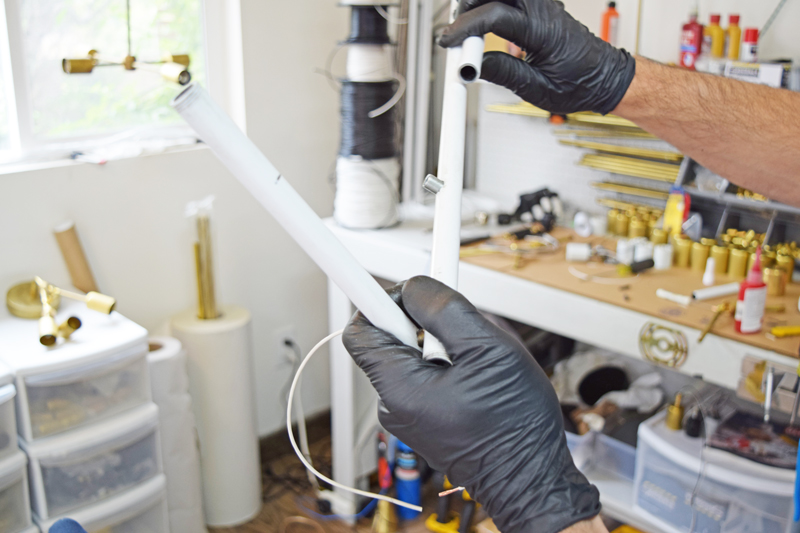
Ben, who was wearing rubber gloves while he worked to avoid electrification, showed me how he joins metal pieces to create these sculptural masterpieces.
Since the pieces Jolene and Ben are creating are part a larger lighting scheme at Orcondo, I went through the entire plan with them to give them an idea of the look/feel I’m going for. Basically, I want the whole thing to feel fresh and airy, so I want the lighting to be light in form, meaning that I want thin, elegant chandeliers, not bold, chunky ones.
This is the initial sketch we came up with. I love how light and open it is. Obviously, it’s going to be on a dimmer so we don’t get blinded by all those individual lights burning our little retinas.
That’s a render of the living room with the fixture. I just found out the Silver Lake Reservoir (which is right outside the window) is going to be empty for a year so all my “after” photos are going to look like they were shot during The Apocalypse.
Speaking of Apocalypse, these fun fixtures look kind of like alien life forms come to Earth to fix our lighting situation. In a good way. Also, I love that they sit on those fancy mid-century chairs.
Jolene and Ben have a mega brass addiction. Even their razorblades are brass.
Ben explained the specifics of how their fixtures are made so I could fully understand what silhouettes were possible and which were never going to work. The sketch I made above probably won’t work because there’s not enough space for the wiring and there’s too many intersections, so the final product will likely be a lot different. But that just makes the whole thing even more exciting because I literally have no idea at this point what it’s going to look like.
To see more of Jolene and Ben’s work (along with some amazing shots of their interior design work), check out their site and their Etsy page.
Love,
Orlando
PS: I thought it might be interesting to share my Lighting Plan for Orcondo. If you’re moving into a new place, renovating, or buying a whole lot of lighting at once I find creating a document like this can help you figure out how it’s all going to work together. The goal is to create a lighting story that works throughout the home, and since the materials of lighting are going to be contrasting with each other and other elements in the space, it’s important to be mindful of how they look together.


First off, Hey Booty.
Secondly, nosey is always the best policy.
Josh | The Kentucky Gent
http://thekentuckygent.com
I’ve never been more obsessed with lighting.
Oooh! I have those same exact Robert Abbey sconces in our living room flanking the TV; I love that I picked even one single thing the same as you you did without knowing it. <3
But make sure you get them from the same lot, because the lacquer finish is totally different on one than the other (and it started to chip off of both at a different rate, so I recommend finding a way to remove it on both before installing).